The information in
this document is confidential and meant for use only by the intended recipient.
It is the sole property of Aero Fulfillment Services and its subsidiaries.
Acceptance and/or use of any of the information contained in this document
indicates agreement not to disclose or otherwise make available to any person
not employed by the intended recipient, or to any other entity, any of the
information contained herein. This documentation has the sole purpose of
providing information regarding Aero Fulfillment Services software product or
service and shall be disclosed only to those individuals employed by the
intended recipient who have a definite need to know.
Any entity with
access to this information shall have signed or shall be required to sign a
nondisclosure confidentiality agreement.
Aero Fulfillment
Services and the Aero Fulfillment Services logo are trademarks and is a
registered trademark of Aero Fulfillment Services. Aero Fulfillment Services
refers to Aero Fulfillment Services and any wholly owned subsidiaries. All
other trademarks are the property of their respective owners.
This documentation is
subject to change without notice, and Aero Fulfillment Services Corporation
does not warrant that the material contained in this documentation is free of
errors. Any errors found in this document should be reported to the author in
writing. Point of contact Aero Account Services is If you have received this
document via e-mail in error, please send the e-mail to the originator,
indicating that you received it in error. If you have received a hard copy of
this document in error, mail this document in its entirety to Aero Fulfillment
Services, 3900
Aero Drive, Mason,
OhioUSA 45040.
The Web Services Client Users Manual, Release
6.0, is designed to assist you with using the functions within the
application.
It is divided into sections
for the Administrator and the User(s), hereinafter referred to as
Customer(s). The purpose of this guide is to assist the user in the use of
the application to ensure error free information input and retrieval.
The guide is organized in a
manner that mirrors the steps required for using the application. Following
these steps will promote a smooth progression through the use of the
application.
Audience
This Web Services Client
Users Manual, Release 6.0,
is written for anyone who is responsible for the input and retrieval of
information using the application.
The main emphasis being on
the Administrator and the Customer.
It is assumed that the user
understands basic computer use and operation and has read all of the
documentation associated with this application. Do not proceed before you
read this entire document.
Cross-Reference Links
There are various cross-reference links
contained in this documentation. These cross-reference links are blue in color and when selected will take you directly
to the subject matter referenced by that link.
Before
you begin
It is recommended that you
read this manual before you use the application to help familiarize yourself
with Release 6.0.
Address comments, questions
or problems about this manual to the author.
Content
Overview
This manual contains
the following information:
Symbols and Conventions
The following formats
and icons are designed to help you quickly understand the information.
Text Formats
Text that is…
Represents…
Bold
·Text that you enter
in a field of a graphical or command prompt interface.
·A command that
you type at a command prompt. A command can have the syntax: command [option1 | option2]
arguments
where [square brackets] represent optional parameters
and the character “|” represents a choice of one or another.
·Buttons, screen
names, or field names.
Courier font
In the text-mode interface:
·Text displayed
by the software.
·Programming code
samples.
UPPERCASE
·Domain names.
Example: RC_PROD.
·Database table names.
Example: NE_CELL_SITE.
·Keystrokes.
Example SHIFT or CTRL+ALT+DELETE.
Letter
Gothic font
Names of:
·Files. Example: webgui.html
·Directories.
Example: temp
·Paths.
Example:/opt/oracle/
·Variable names. The
name is shown preceded by a dollar sign when referencing the
it’s value. Example: $App_Domain.
Italicized items
Display items. Example: AutoComplete.
“Names in Quote Marks”
Names of chapters or sections
in chapters.
Icons
This icon…
Represents…
A note that is related to the
current information. This provides more depth or helpful tips.
A warning.
Warning notes tell you that the
action you are about to perform could create an undesirable change or
condition. However, you can continue the process or select other
alternatives.
A critical stop.
Critical notes tell you that the
action you are about to perform could cause the system to lose all or part of
its data or to shut down.
2Introduction and Overview
This document isintended
to provide the Administrator and User/Customer with a detailed description of
the Web Site Application, Release 6.0.
It also provides detailed instruction for the use of the
application by Administrators and Customers.
The application is a multi display interface that allows
for a single application to service all fulfillments over the World-Wide Web.
It includes the following:
·Fulfillment
Management
·Order Management
·Inventory
Management
·Customer
Management
System
Architecture
This application architecture is built across logical
layers..
3Logging In
The Security associated with the application requires that
Administrators and Customers alike enter a User Name and a Password to gain access
to the application on the Web Site.
Only the fulfillments, where you, the Customer have
permissions to access, will appear on the display when you enter the
application.
If you are acting in the capacity of an Administrator, and
have a need to access additional fulfillment areas, or accomplish additional
tasks within those fulfillment areas, you must first have your corporate
approval and permission before being granted access those areas by the Aero
Fulfillment Services Account Management Department.
If you are a Customer, and have a need to access
additional fulfillment areas or additional tasks within those fulfillment
areas, you must first have your corporate approval and permissions granted to
enter those areas by your local Administrator.
Users at all levels of access
have various levels of permissions and different access to fulfillments and
tasks within those fulfillments.
The Administrator will only be
able to work and assign permissions to other Customers in the fulfillment
areas and tasks within those areas where they have been given permission to
access and allow access.
Getting Started
Once you have been approved as a
Administrator or Customer and have received your User Name and Password from
the either the Aero Fulfillment Services Account Services Department or your
local Administrator respectively, go to http://aerotest/efulfillment/
.
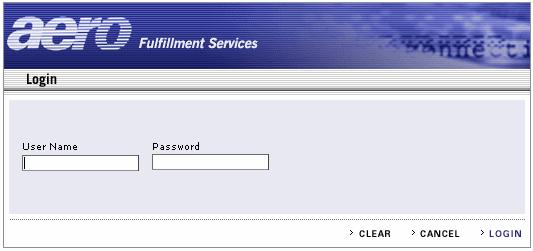
When you enter the site the Aero Fulfillment Services Login will display.
Error! Bookmark not defined.
If you are logging in as an Administrator
and can not access the Web Site contact Aero Fulfillment Services Account
Management Department.
User Name and
Password
Enter your User Name (Email
Address) and Password forwarded from the Aero Fulfillment Services
Account Management Department (if you are an Administrator), or your local
Administrator (if you are a Customer) in the fields provided in the Login display.
If after entering your User
Name and Password does not grant you access to the application, or if your
password cannot be located, contact the Aero Fulfillment Services Account
Management Department if you are an Administrator or your local Administrator
if you are a Customer.
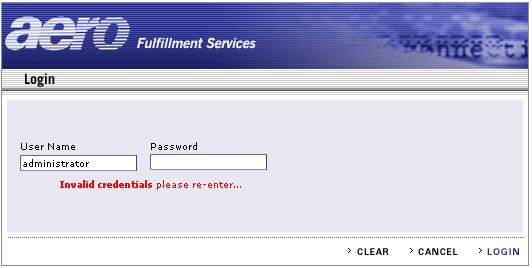
Incorrect
Login
If you entered the incorrect login, or you have not been
entered into the system (User Name or Password), the following will display.
If this happens reenter the information again.
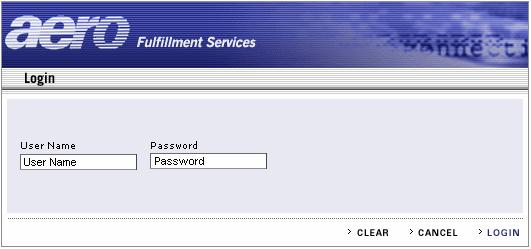
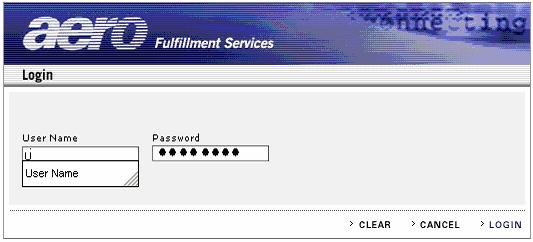
Subsequent Sessions
The following will display the next time you want to work
in the application and start entering your user name into the user name field.
Just
highlight, (click on) when
it appears, and your User Name and Password will automatically populate their
appropriate field.
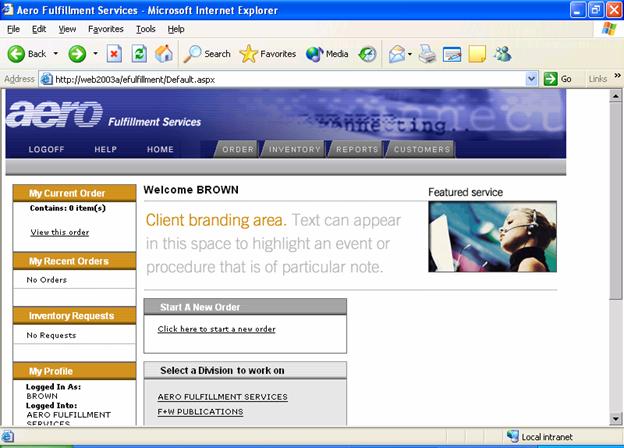
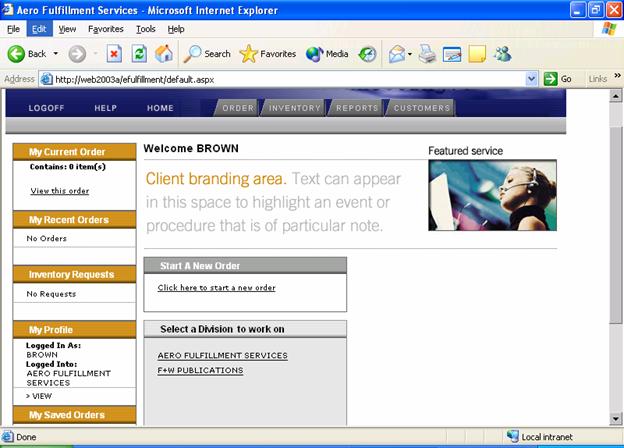
Aero Application Home Page
If all of the login information is correct and you are
entered into the application the home page will display once you click on > LOGIN.
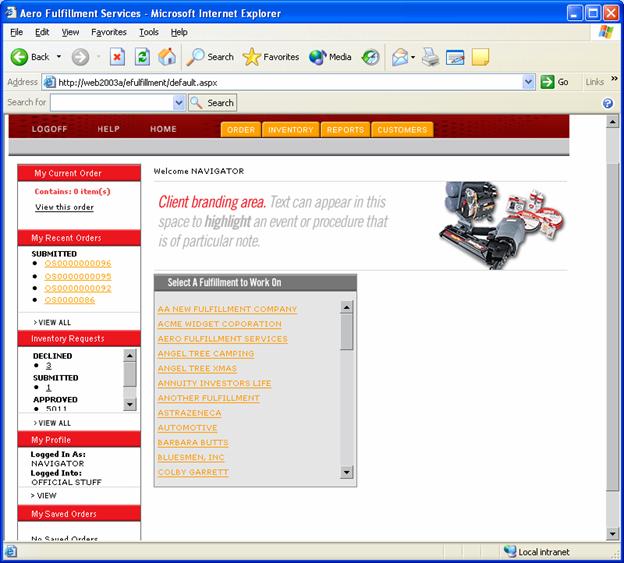
Fulfillment
Selection
Follow the procedures in Logging
Inon page3-1 to log into the application.
In the near middle of the web page there is a box titled
“Select A Fulfillment To Work On”.This is a list of all the Fulfillments that
the user that has logged on has access to.After doing so, the following screen will display:
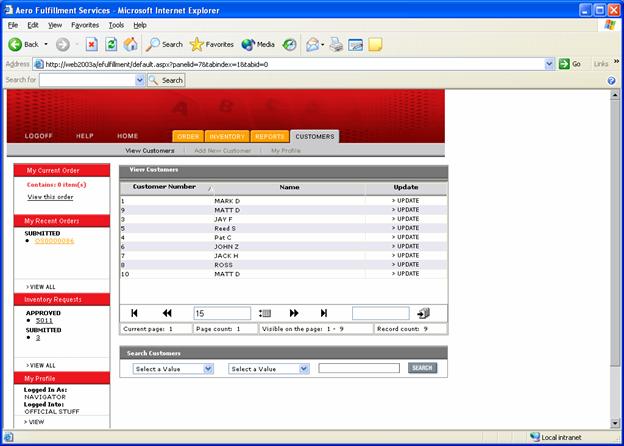
Please note the information under the box titled “My
Profile”.The “Logged In
As” should contain the user login.The
“Logged Into”should
contain the Fulfillment that the user is now working in.
4Customers
Introduction
There are two classes of users associated with the Web
Services application. They are the Customers that receive product and Customers
that place orders for customers to receive product.
This chapter deals with managing those customers.
Access to the Web Site is available for all Customers of
the Internet, but in all cases, access to the application at the Web Site is a
privilege, meaning the Customer must be granted permission to enter and have
been issued their appropriate User Name and password.
Logging
In
Follow the
procedures in Logging
Inon page3-1 to log into the application.
The initial screen
appears as follows:
Adding New Customers
To add new Customers to a Fulfillment(s), click on under the tab.
The following will display:
Customer Number
The unique number assigned to this customer.
Name
The name of the customer.
Email Address
This field has two purposes depending on the type of
customer.
For a customer receiving product, it is used for
notification purposes.
For a customer that will also be accessing the fulfillment
to place orders for other customers, this is part of their login.
Password
This field has two purposes depending on the type of
customer.
For a customer receiving product, it is not needed.
For a customer that will also be accessing the fulfillment
to place orders for other customers, this is part of their login.
Confirm Password
This must match the Password field.
Phone Number
Contact number of the customer.
Shipping Account Number
Account number to collect shipping charges.
CostCenter
The cost Center associated with the customer.
Status
Selectfrom the drop down list:
Active –
Current customer.
In-Active – No longer a customer.
Ship To:
Attention
Name to receive attention upon receipt.
Address 1
Address line 1 of delivery.
Address 2
Address line 2 of delivery.
Address 3
Address line 3 of delivery.
City
City of delivery.
State/Province
Select the State or Province of delivery.
Postal Code
Zip code of delivery.
Country
Select the country of delivery.
Bill To box
Check this box if the delivery and billing address are the
same.The Ship To information will then
populate into the Bill To fields.
Attention
Name to receive attention for billing.
Address 1
Address line 1 of billing.
Address 2
Address line 2 of billing.
Address 3
Address line 3 of billing.
City
City of billing.
State/Province
Select the State or Province of billing.
Postal Code
Zip code of billing.
Country
Select the country of billing.
Assigning Permissions
Permissions has two purposes
depending on the type of customer.
For a customer receiving product, it is not needed.
For a customer that will also be accessing the fulfillment
to place orders for other customers, they need to be given permission to the
Fulfillments they can work in.
To enter or change Permissions for the Customer click on
the
button
located at the bottom of the display.
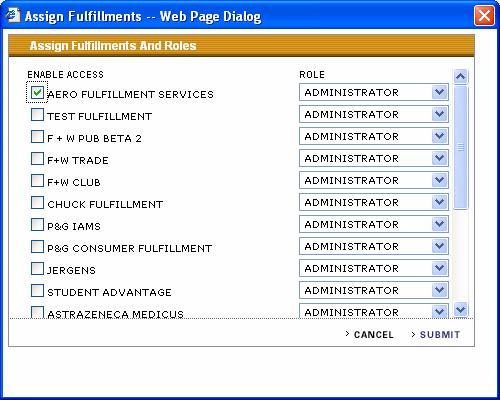
The following will display.
Enable Access
Click on the box of the Fulfillment that the customer will
be accessing.
Role
For each Fulfillment that a customer can access, they must
be assigned a role.The drop down list
will contain the roles that were set up for each Fulfillment during Fulfillment
Administration.If the proper role is
not there, Aero Account Services will need to define that role.
When finished, click on the OK button and the program will
return to the New Customer screen.
Once all the information has been entered, click on the
Submit button.The information will then
be added to the Fulfillment System.
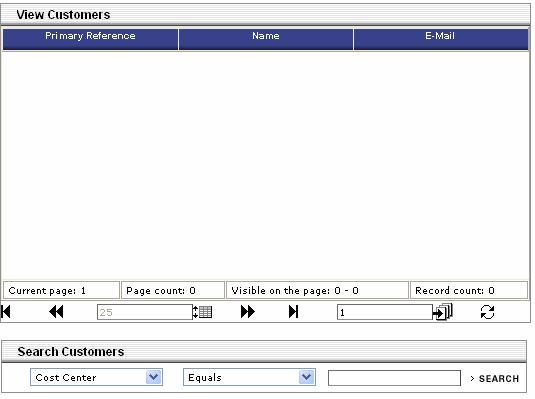
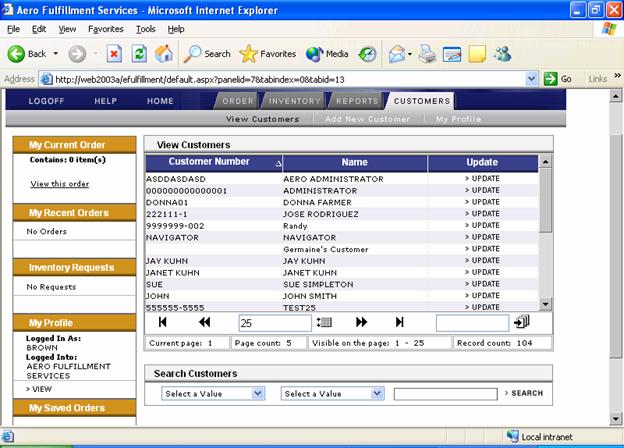
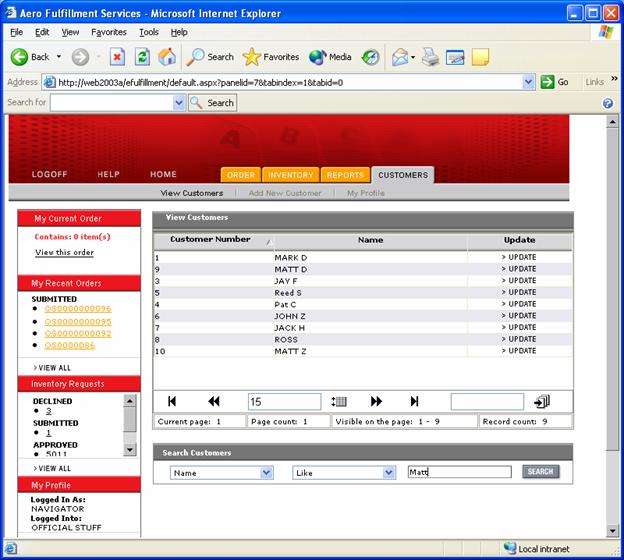
Viewing Customers
To view a specific Customer, click on the tab.
The following will be displayed under the tab.
Click on View Customers.
The following will display.
To find a Customer, go to ‘Search Customers’ at the bottom
of the display. At the pull down, (presently populated with ‘Name’) select an
item from the pull down menu.
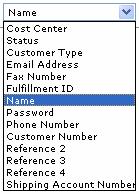
Customer Search
Variables
The Search Parameters available under search Customers are
dependent upon the fields marked as Searchable during Field Management in
Fulfillment Administration.
Select the appropriate Search item. Select one of the
following in regards to the search item.
Enter the appropriate items in the fields.
In this case the search is as follows: ‘Status - - -
Equals’.
In this case ‘Name – Equals – ‘Sue’ was entered
Once the fields are populated click on
the button.
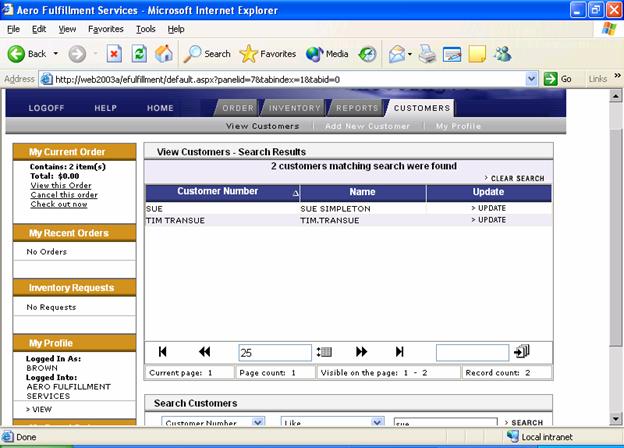
The following will display.
For this example the View Customers list has displayed the
customer Sue Simpleton who has a Customer Number of Sue within this
Fulfillment.
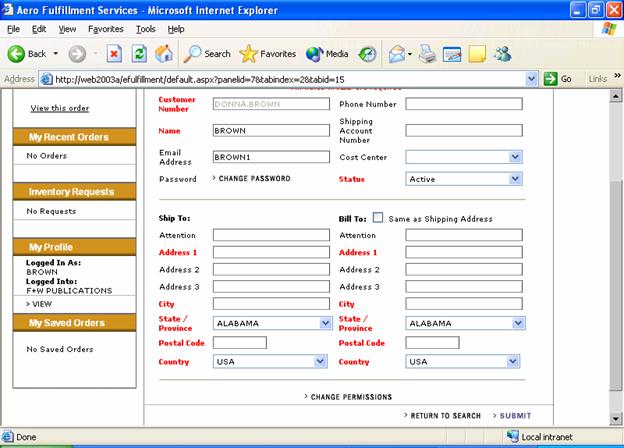
Updating Customers
To update customer information, click on VIEW CUSTOMERS under the tab.
The following
will display:
Select a customer and click on the UPDATE button on the
line.The following will display:
From here on this feature performs the same as adding a
new customer except for the functionality of the Password section.
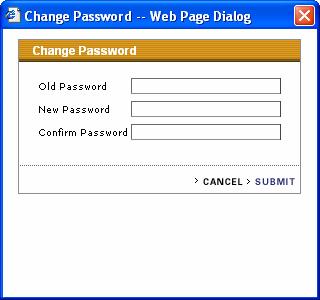
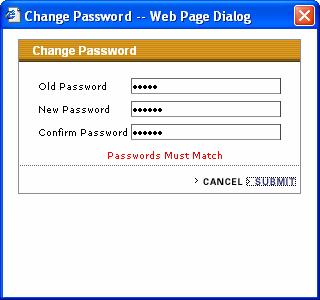
Changing
Customer Passwords
To change a Password for a Customer click on.The following will display:
Enter an Old Password, New Password and Confirm Password
for the customer. If they do not match the following will display:
If this is the case update entries and click on the button.
You can also cancel the entry at this time by clicking on
the
button.
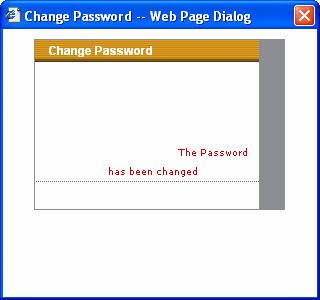
The following will display.
Click on the button and the following will display.
Click on
Submit to save changes.
Changing or
Removing Permissions
To change/remove permissions that have been assigned to a
Customer, click on the button.The following will display:
The following will display.
Add or delete the checkmark from the fulfillment (Enable
Access) to add or delete the fulfillment.
Once you have set the new fulfillment roles for the
Customers needs click on.
Once this display has closed click on >SUBMITto submit the changes to
the Customers roles.
Updating Your Profile
As an Administrator, your initial information was added to
your profile by Aero Fulfillment. When you enter the application for the first
time it is suggested that you visit theMy Profilearea toensure that all the areas have been filled in and
that the information is correct.
To update your profile simply click on View under My Profile and the following will display:
From here on this feature performs the same as Updating A Customer.
5Inventory
Introduction
In general, everything done on the web site is done in
real time.The addition of a customer or
change to a customer record takes affect upon the click of the Submit
button.Orders that are input are added
to the order database immediately.However, inventory does not perform the same way.The addition of or change to inventory, when
submitted, is loaded to a separate area.These records must then be reviewed by Account Services.Upon their review, they are either declined
or approved.The approved records will
then update the inventory database immediately.Declined records are sent back to the web
site for the person who submitted the change to review.
Logging
In
Follow the procedures in Logging
Inon page3-1 to log into the application.
The initial screen appears as follows:
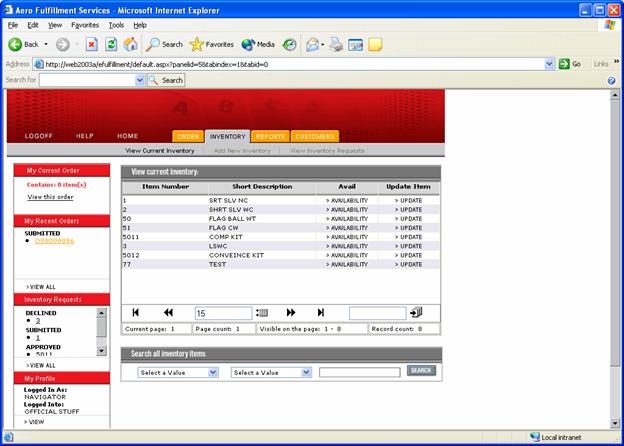
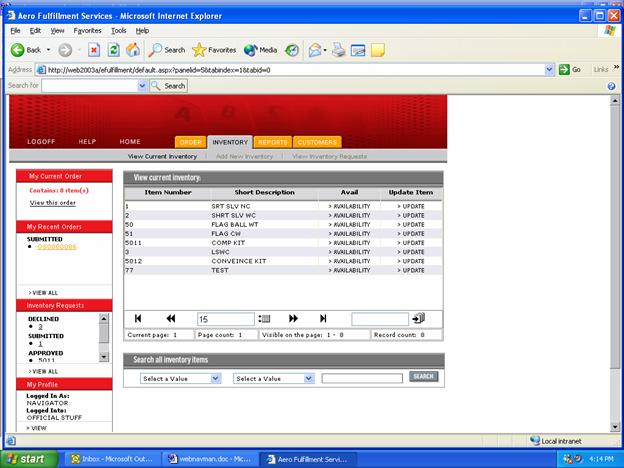
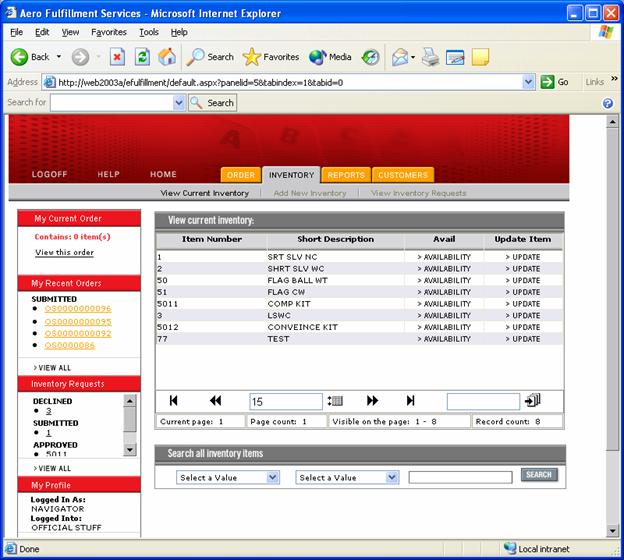
View
Current Inventory
To view inventory click on the tab.The first option that will appear is the “view Current Inventory”
screen.
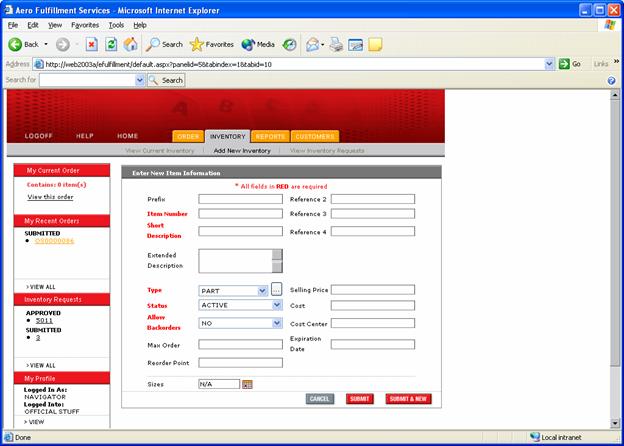
Adding
Inventory Items
To add new inventory click on the tab.
When this is selected the following will display.
Click on and
the following will display.
Prefix
The associated prefix for the item.
Item Number
The unique item ID.
Short Description
The short description of the item.
Extended Description
The long description for the item.
Type
Select from the following:
Part–A
stand alone item.
Example: Item 1 – Skim Milk
Item
150 – Wheaties
Item
200 - Banana
Assembly–A
stand alone item is made up of several parts previously assembled and ready for
shipment.
Example:Item 300 – Wheaties and Banana in Milk.
Convenience Kit– Several parts that are not previously
assembeld, but will be assembled at shipment time.
Example:Item 400 – Brekfast Kit (Not a real
item)
Includes:
Item 1 – Skim Milk
Item 150 – Wheaties
Item
200 – Banana
At shipment time Item 400 explodes down to the component
levels of Item 1, Item 150 and Item 200 and deducts each from inventory.
Companion Kit– Two or more parts that are included with each
other at shipment time.
Example:Item 1 – Skim Milk
Incude Item 200 – Banana
At shipment time Item 1, and Item 200 are deducted frominventory.
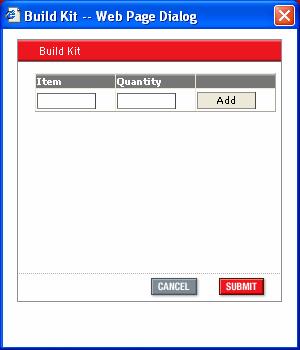
Any time one of the kit options is selected, the items that
are part of the kit must be identified.This is done by clicking on the elipse next to the drop down arrow in
the field.The following screen will
appear:
Input each kit item and quantity, and click on the Add
button.When finished, click on
Submit.
StatusError! Bookmark not defined.
Active – Can be ordered.
Inactive – Can not be ordered.
Allow Backorders
The selection of “Yes” will allow orders to go on backorder
Max Order
Maximum quantity that can be on one order line.
Reorder Point
Quantity to trigger a request to order more product.
Reference 2
Additional reference 2.
Reference 3
Additional reference 3.
Reference 4
Additional reference 4.
Selling Price
Price the item is to be sold at.
Cost
Cost associated to the item.
CostCenter
Location where costs are accumulated.
Expiration Date
Date the item is no longer a valid inventory item.
Additional Data
Any additional data fields that were set up during Field
Management of Fulfillment Administration.
Once the information is entered click on the button.
To cancel the addition of the inventory
item click on thebutton.
The following confirmation screen will display:
Click on “Return To Search’ to go
to the Inventory List screen.
Click on “Add” to continue adding inventory items.
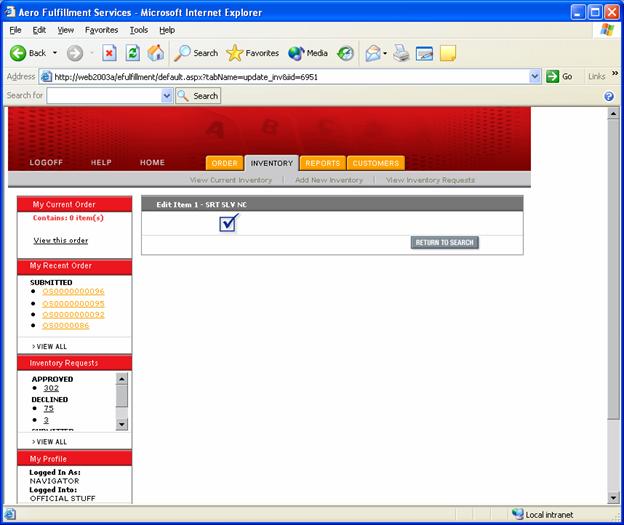
Updating
An Inventory Item
To update, or edit, an Inventory Item,
click on > UPDATE on the right side of the line item under ‘Update Item’.
The following will display.
The update of an inventory item performs the same way as
the addition of an item.
Once you have entered all of the
information click on and the following will display:
Click on “Return To Search” to go
to the Inventory List screen.
From the Inventory detail screen,the re are two additional options:
View Image – This button will display a picture of the
item
Check Availability – This button will show current
inventory values for an item.
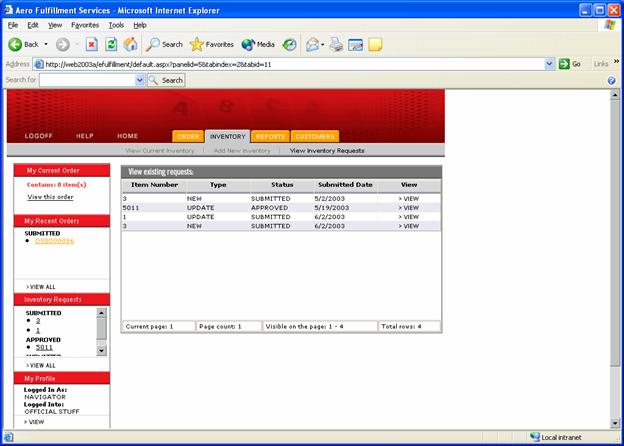
Viewing Inventory Requests
To view inventory requests click on ‘View Inventory Requests’ and the following will display.
This display will show all of
the submitted requests, with the followinginformation:
Item
Number
The item
number entered.
Type
New – Request to add an inventory item.
Update – Request to change an inventory
item.
Status
Approved – Approved by the
Account Services representative and now a part of the inventory.
Declined – The item has not been approved.
Submitted – The item has not yet been
approved or declined.
Submitted
Date
Date the
request was made.
View
Click on this button, and the screen showing the Inventory
RequestDetail
will appear. If the Item has been declined, there should be a reason in the
Comments section.
Inventory Requests Shortcut
On either the left hand side of
the screen or the right (depending on how the web site is set up), there is a
box labeled “Inventory Requests”.
This box will contain the most
recent inventory requests, based on the item number.By clicking on the item number, the
“Inventory Request Detail” screen will appear.A slide bar is provided in the box to scroll through the item numbers.
6Orders
Introduction
This chapter will cover the function of placing an order
within a Fulfillment.
Logging in
Follow the procedures in Logging
Inon page3-1 to log into the application.After selecting a Fulfillment, click on the
Order tab at the top of the page.The
following screen will display:
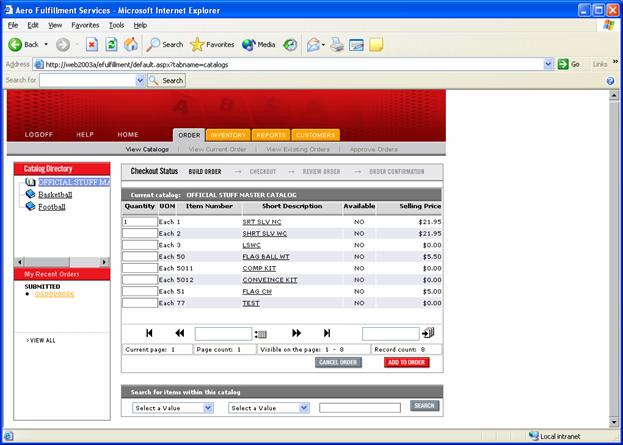
This screen is a listing of the inventory in the default
master catalog.
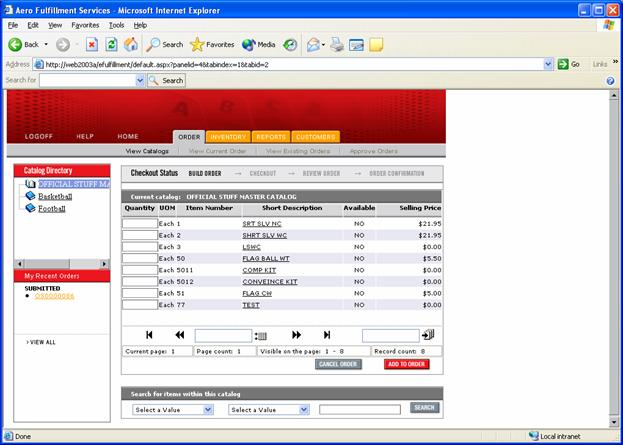
View Catalogs
Additional catalogs that have been set up for the
Fulfillment will be shown in the box titled “Catalog Directory”.This box may be on the left or right
depending on how the web site has been setup.By clicking on a specific catalog, the order screen will change to show
the inventory associated with that catalog.
Build Order
The first step in the order process is to build the
order.The easiest way to build an order
is to key a quantity into the Quantity box next to an item on the order
screen.For example, we are going to
order one of Item 1 on the following screen.
The next step is to click on the “Add To
Order” button.More than one quantity
could have been entered to any number of inventory items.
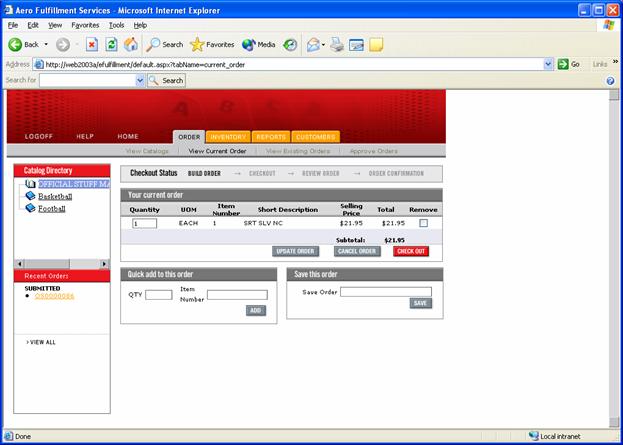
The following screen will then display:
From this display several actions may be taken:
Line Item
Changes
The quantity on any line item may be changed by keying a
new number in the quantity box and clicking on “Update Order”.
A line item may be removed by checking the box under the
heading “Remove” and clicking on “Update Order”.
The entire order may be canceled by clicking on the
“Cancel Order” button.
Quick Add To
This Order
This feature will give the user a quick method to add
items to an order.At the bottom of the
“Current Order” screen, the box for “Quick Add To This
Order” will be found.By keying a number
into the Quantity box and an item number into the Item Number box and then
clicking on the “ADD” button, an item is added to the existing order.
Save This
Order
An additional feature box found at the bottom of the
“Current Order” screen is the ability to save the current order so that you may
return to it later.This is done by
keying an identifier into the box labeled “Save Order”, and then clicking the
“Save” button.By doing this all the
detail of the current order will be saved under the identifier keyed into the
box.
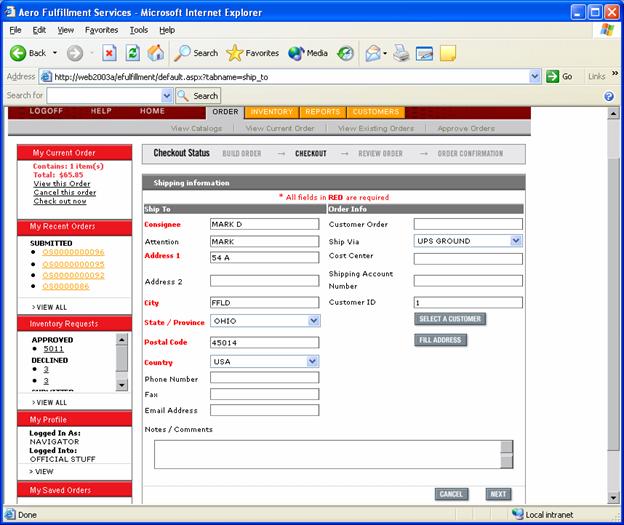
Check Out
After the order line items have been entered, click on the
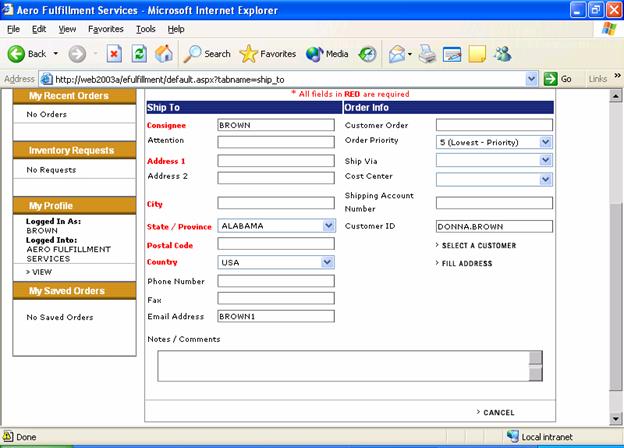
“Check Out” button, and the “Shipping Information” screen will display:
Ship To
Consignee
Name of person or company receiving the
order.
Attention
Name of the person that should receive
the order.
Address 1
Address 1 of recipient.
Address 2
Address 2 of recipient.
City
City of recipient.
State/Province
Select the State or Province of the recipient.
Postal Code
The zip code of the recipient.
Country
Select the Country of the recipient.
Phone Number
Phone number of recipient.
Fax
Fax number of the recipient.
Email Address
Email address of the recipient.
Notes/Comments
Any notes or comments pertinent to the
order.
Order Info
Customer Order
Any customer order number required by
the customer.
Ship Via
Select the method of shipment.These methods were determined in Shipping
Methods during Fulfillment Administration.If the desired shipping method is not there, the Account Services
representative will need to be notified.
CostCenter
Any associated cost center for the order.
Shipping Account Number
An account number to receive shipping
charges.
Customer ID
The unique customer identifier.
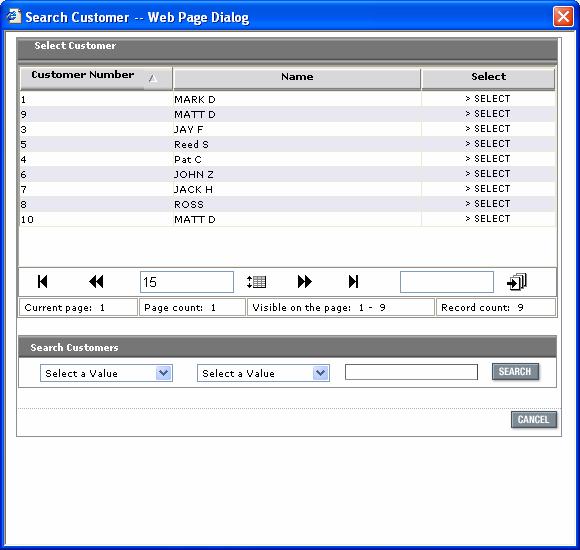
Select A Customer
This feature will give the user the ability to select a
customer from the Fulfillment to receive the order.Click on this feature, and the following
screen will display:
Find the customer from the list, and click on the Select
button.
The Shipping Information screen will return with the data
fields populated from the customer record.
Fill Address
This option can be used when the Customer ID is
known.Enter the ID in the Customer ID
field, click on the Fill Address button, and the address information for that
customer will fill the screen fields.
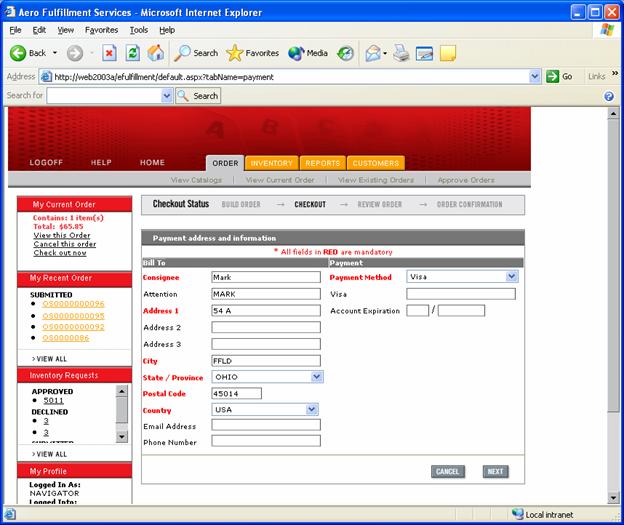
Payment
Information
If payment has been enabled for the Fulfillment, the
Payment Address and Information screen will appear as follows:
Bill To
This information is copied from the Ship-To information
from the previous screen.If the Bill-To
is different from the Ship-To, it will need to be changed here.
Payment
Payment Method
Select from the list of payment methods that were set up
during Fulfillment Administration.If a
Payment Method is missing, the Account Services Representative for the
Fulfillment will need to be contacted.
VISA
The credit card number.
Account Expiration
Enter the expiration date of the credit card.The format for month is MM and the format for
year is YYYY.The date 05/03, would be entered as 05 / 2003.
Click on the “Next” button after completing this screen.
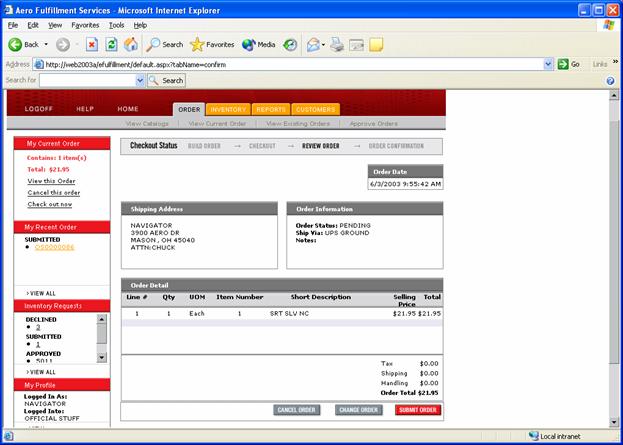
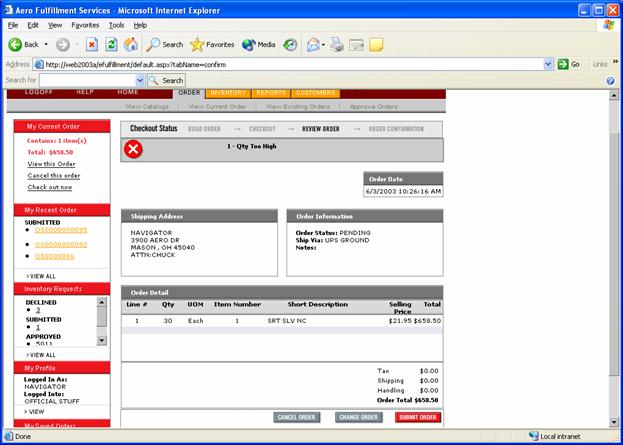
Review Order
The next screen in the order process is the “Review Order”
screen.It will appear as follows:
From this screen several options may be selected:
If the order is not correct and the appropriate changes
can not be made, the order may be canceled by clicking the “Cancel Order”
button.
If some of the information needs to be corrected, the
order can be restarted at the “Current Order” screen by clicking on the “Change
Order” button.
If the order is in ready to be completed, click on the
“Submit Order” button.
Order
Confirmation
This is the last screen in the order process.This screen gives all the detail information
associated with the order, including the Aero Order Number.
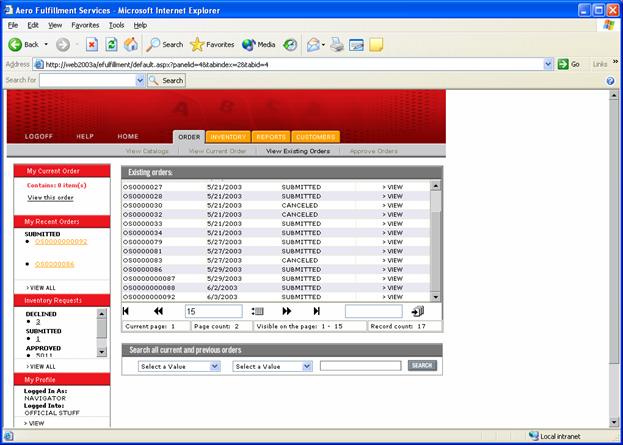
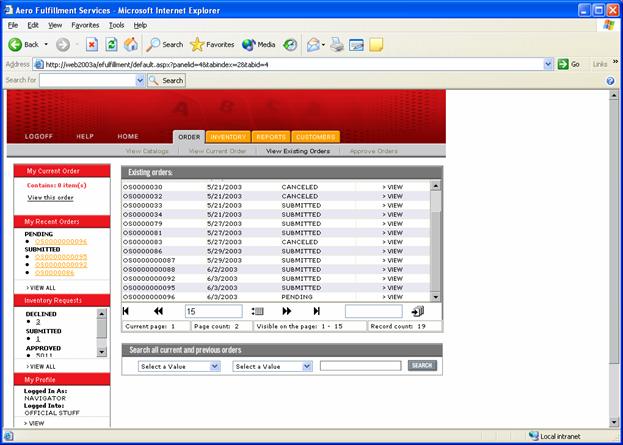
View Existing Orders
Under the Orders tab, is the option “View Existing
Orders”.By clicking on this, the
following screen will display:
This screen gives a listing of all the existing orders
within the Fulfillment.By clicking on
the “View” button next to any order, a screen similar to the Order Confirmation
screen will appear for the order.On the
bottom of the screen there are two features for the user.
Resubmit This
Exact Order
By clicking on this option, the order will be duplicated.The screen will take the user to the Order
Confirmation screen with all the order details duplicated under a new Aero
Order Number.The user will then have to
click on “Submit Order” to confirm the order.
Add These
Items To A New Order
By clicking on this option, the order will be
duplicated.The screen this time however
will take the user back to the first screen where the order is built.
Approve Orders
Prior to order confirmation, the rules established during
Fulfillment Administration for an order are processed.The results of the rule test are dependent on
how the rule was set up.If the rule was
set to Cancel_Order the error must be fixed for the
order to complete.For example, a rule
has been set up for this Fulfillment that will not allow a line item quantity
above 25.When an order is submitted for
a line item quantity of 30 a message appears at the top of the display as
follows:
At this point,
the user must click on the “Change Order” button and correct the error or
Cancel the order.
Had the result
of the rule test been Require_Approval, the order
would have gone through Order Confirmation, however
the status of the order would be “Pending”.This can be seen on the last order on the following display of View
Existing Orders:
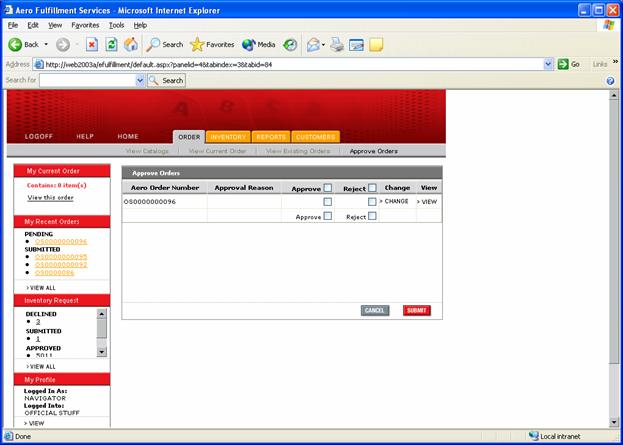
To process
this order, the order must be approved.To do this, click on the “Approve Orders” feature under the Order tab
and the following screen will appear:
From this
screen the user has several options:
View
– The view button will display the order confirmation screen.
Change – The change button will allow
the user to make changes to the order and thereby pass the violated rule.
Reject – Check this box and then click
Submit, and the order will be cancelled. The Status of the order will change
from Pending to Canceled.
Approve – Check this box, then click
Submit, and the order will be sent on for processing.The Status for the order will change from
Pending to Submitted.
When approving an order, the
order rules are processed again.If the
user approving the order is subject to the rule by means of their Role, the order can not be
approved.
Order Shortcuts
Depending on how the web site has been configured, there
are two boxes on either the left or right hand side of the screen.These two boxes provide quick access to
recent data.
My Current
Order
Once an order has been started, it is possible to access
other areas of the web page.Whenever an
order has been started and the user accesses another page of the web site, the
box titled “My Current Order” will appear.This box contains any order that has been started along with the number of
items on the order and the order value.Within the box, the user has three options:
View This Order – Clicking on this option will bring up the Build
Order screen.
Cancel This Order – Click on this option, and a confirmation screen
will appear.If you answer “Yes” to the
confirmation, the order information entered is removed from the current order.
Check Out Now – Click on this option, and the order that was
started will proceed to the “Shipping Information” screen.
My Recent
Orders
Another box present on any page is “My Recent
Orders”.This box holds the last four
orders that were processed through the system along with their status.Clicking on any one of the orders will bring
up the Order Confirmation screen for that order.
There is also a “View All” option.Clicking on this option is the same as
clicking on “View Existing Orders” under the “Order” tab.
My Saved Orders
Earlier when building an order, there was an option to
Save This Order.This option is used to
interrupt an order but not loose the items that have been entered.The order is saved under an identifier for
later completion.That identifier can be
found under the box titled “My Saved Orders”.There is not limit to the number of saved orders, and the identifier is
not unique.The saved order does not
disappear even after it is completed.
The user may click on any identifier in the My Saved
Orders box, and the order will be restarted with all the items previously
entered at the Build Order screen.
This chapter contains information on ‘how to’ conduct searches within various areas in a
fulfillment.Example searches will be conducted
with a demonstration Fulfillment.Actual
results within another Fulfillment may vary.
Logging In
Follow the procedures in Logging
Inon page3-1 to log into the application.After selecting a Fulfillment, click on the
Customers tab at the top of the page.The following screen will display:
Search Bar
Any application that has the ability for a Search, will have
the search bar at the bottom of the screen.Every search performs the same regardless of the application area.The search bar contains three fields and the
Search button.
Search Field
The first box on the search bar is a drop down list of fields
that are searchable for the application.The searchable fields were determined within Field Management during
Fulfillment Administration.
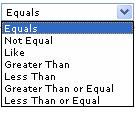
Operator
The operator box is a drop down list of types of matches
to use during the search.These types
are the typical “Greater Than”, “Less Than”, “Like”, “Equal”, etc.
Target
The target box is information that the user will key
in.This is the information that the
user is looking to find within the application records.
Customer Search
From the Customers screen, the search is for all customers
that have “Matt” in their name.The
search argument is:
Search FieldOperatorTarget
NameLikeSue
The screen would appear as follows:
Click on the “Search” button, and the following results
would appear:
Two records were found in the customer database:Sue and Tim Transue.These records may now be selected for
maintenance.
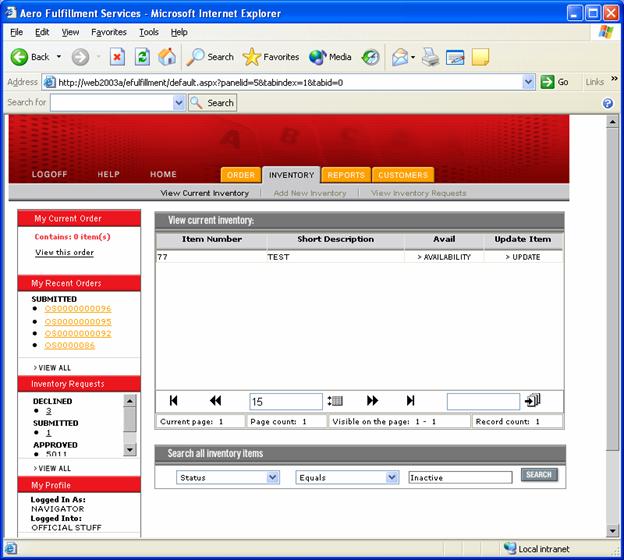
Inventory Search
To search for Inventory Items click on and the following will display.
The goal of this search is to find all inventory items
that are inactive.The search would
appear as follows:
Search FieldOperatorTarget
StatusEqualInactive
The screen would appear as follows:
Click on the “Search” button and the screen will return
with the following results:
Item Number 77 is the only inventory item with a status of
“Inactive”.
8Reports
Introduction
The Reports
portion of the application allows the Administrator or Customer to retrieve
reports regarding the fulfillment.
These Reports
include information regarding:
·Inventory
·Customers
·Category
·Orders
To retrieve a
Report you must first log into the application.
Follow the
procedures in Logging
Inon page3-1 to log into the application.
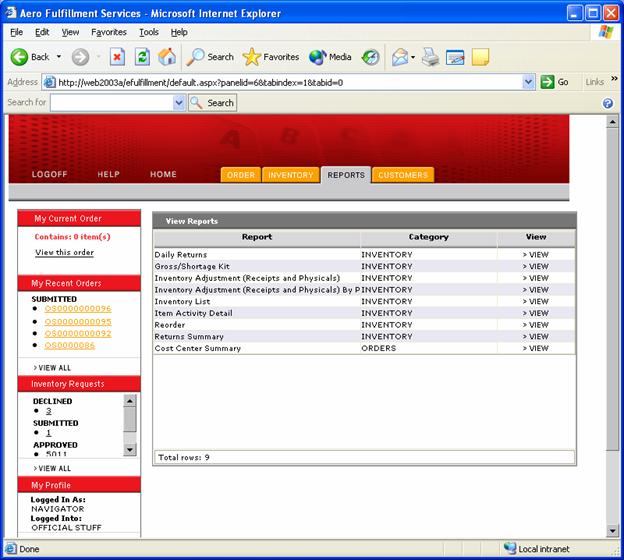
After selecting a
Fulfillment, click on the Reports tab.The following screen will display:
View Reports
This screen will
show all the reports that are available to the user within the
Fulfillment.The availability of reports
is dependent upon several things.The
report must be selected in the Report section of Fulfillment
Administration.Also the report must be
assigned to the role of the current
user.If any one of these conditions is
not met, the Account Services Representative for the Fulfillment must be
contacted for resolution.
Generating a Report
To generate a
report, select “View” on the row associated with the report.
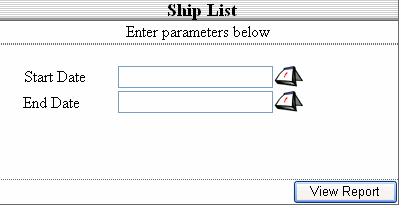
In this case we
will run a report based on Ship List and ORDERS. Click on RUN and the
following will display.
There are two
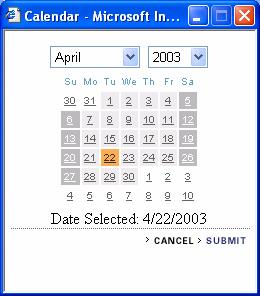
parameters associated with the Ship List, these are
the Start Date and End Date.To select
dates, click on the calendar to the right of the field and the following will
display. In this case the start date selected is April 22, 2002.
Select the date
and close the window.
Do the same for
the Stop Date.
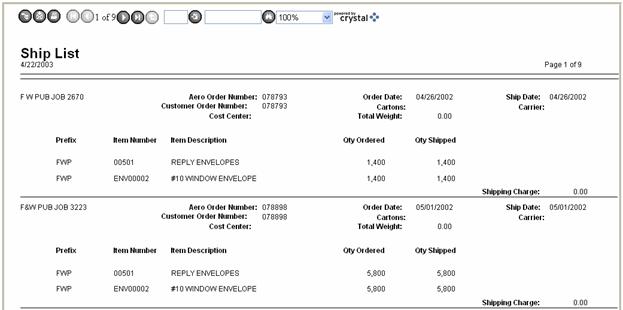
Click on and the following will display.
The areas
associated with the Report for a Fulfillment include:
Pub Job
Aero Order Number
Order Date
Ship Date:
Customer Order Number
Cartons:
Carrier:
CostCenter
Total Weight
Prefix
Item Number
Item Description
Qty. Ordered
Qty Shipped
Report
Toolbar
The Toolbar for
reports include the following functions:
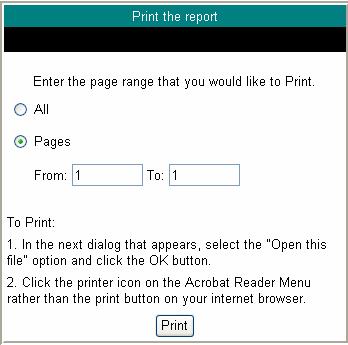
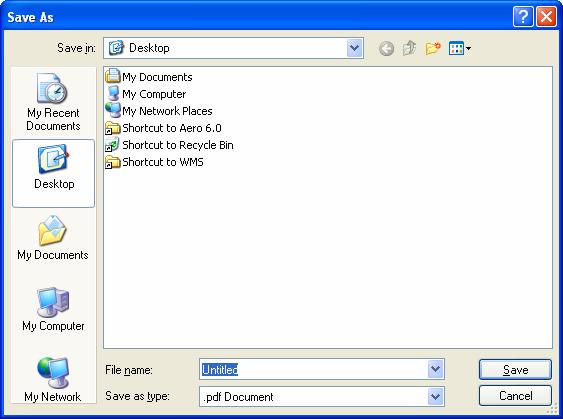
Printing
Reports
When you want to
print a report, click on the Print button and the following will display.
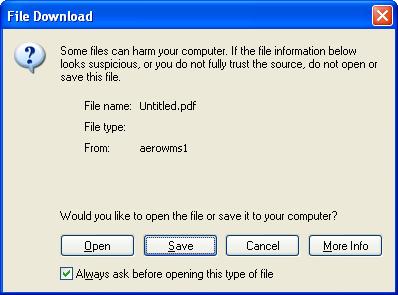
Click on the
button and the following will display.
The file will
print as a pdf, but you must first save the file
prior to printing it
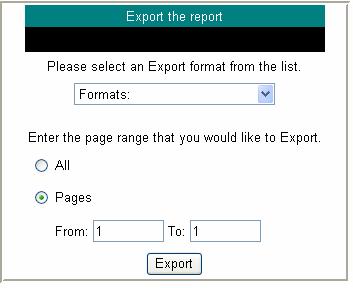
Exporting
Reports
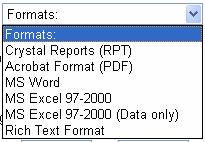
To export a
report click on the file and shoes the export format you need.
These formats
include:
Choose the
format, select the pages, and click on the button.
With your export
selection the following will display.
Save the file
with a new name and select the button
The following
will display.
Rename the file
as you want it saved and click on the button.
9Credit Card Services
This chapter
provides the reader with a brief description of Aero Fulfillment Services
association with CyberSource® ICS Credit
Card Services.
Overview
The CyberSource Credit Card Serviceprovides your business with secure, reliable,
real-time credit card payment processing, without requiring you to develop and
maintain a complex in-house infrastructure.
The service accepts multiple card types, in multiple currencies, and
allow you to connect with multiple banks and processors worldwide. Its
use allows you to easily expand your overall order volume and handle seasonal
order volume peaks.
The CyberSource Credit Card Service is part of the Internet
Commerce SuiteSM (ICS) that includes
electronic payment, fraud management, and verification services.
To use ICS
services, you simply send a request that includes
·information about your company
·the customer
·the applications you want to use
Once submitted,
you will receive a reply with information appropriate to the services you
requested.
You can use the reply
information to interpret the results of your request.
Types of Payment
CyberSource Credit Card Services can process the following
types of cards:
·Credit cards — CyberSource
can accept payments made with numerous types of credit cards, including Visa®,
MasterCard®, Discover®, American Express®, and
others.
·Offline debit cards — CyberSource
can process offline debit cards, also known as check cards or Automated Teller
Machine (ATM) cards, if the card is issued in association with a credit card
association, such as Visa or MasterCard.
·Private label cards — Private label cards are
credit cards that can only be used at the issuing companies' own stores. If you
are interested in using CyberSource to process
transactions for your company's private label card, contact your CyberSource account representative for more information.
The different
types of cards are all processed identically.
Card-Present
and Card-Not-Present Transactions
When you provide
a credit card number, but you do not have access to the physical credit card,
the purchase is known as a card-not-present transaction. For example, a sale on
a Web site or through a call center is a card-not-present transaction.
When a customer
uses a physical credit card to make a purchase, the purchase is known as a
card-present transaction.
Your
card-not-present transactions pose an additional level of risk to your
business, as you cannot directly verify the customer's identification.CyberSource offers
features in the Credit Card Services that can reduce that risk by checking the
validity of the customer's information and notifying you when discrepancies
occur.
The
Payment Industry
This chapter
describes some of the companies in the payment industry and explains how you
work with them to accept payments.
Acquiring
(Merchant) Banks
An acquiring, or
merchant, bank offers accounts to businesses that accept credit card payments.
Before you can accept payments, you must have a merchant bank account from an
acquiring bank.
Your merchant
bank account must be configured to process card-not-present or mail
order/telephone order (MOTO) transactions.
Expect your
acquiring bank to charge a fee and collect a percentage of every transaction.
The combination of the fee and the percentage is called the discount rate.
These charges can be "bundled"—combined into a single charge—or
"unbundled"—charged separately—depending on your acquiring bank and
other factors.
Visa and
MasterCard each have a base fee, called the interchange fee, for each type of
transaction. Your acquiring bank and processor can explain how to minimize this
fee.
Also, if
customers dispute charges to their accounts, you can incur chargebacks.
A chargeback occurs when a charge on a customer's account is reversed. Your
merchant bank will remove the money from your account, and it may charge you a
fee for the chargeback.
If you have a
large number of chargebacks, or if a large number of
your transactions involve fraud, your acquiring bank may increase your discount
rate or revoke your merchant bank account. Contact CyberSource
for information about CyberSource products that can
help prevent fraud.
Issuing
(Consumer) Banks
An issuing, or
consumer, bank underwrites lines of credit for consumers. The issuing bank
provides monthly statements and collects payments. Issuing banks must follow
the rules of the credit card associations to which they belong.
Credit
Card Associations
Credit card
associations manage communications between acquiring banks and issuing banks.
They also develop industry standards, support their brands, and establish fees
for acquiring banks.
Some credit card
associations, such as Visa and MasterCard, are not-for-profit trade
associations. These associations do not issue cards; instead, issuing banks are
members of the associations, and they issue cards under license from the associations.
Other card
companies, such as Discover and American Express, act as the issuing banks for
their own cards. Before you use CyberSource to
process cards from these companies, you must sign agreements with the
companies.
Payment
Processors
Payment
processors connect CyberSource servers with acquiring
banks. Before you can accept payments, you must sign up with a payment
processor.
Your processor
will provide you with unique identification numbers for your account. You must
provide these identification numbers to Customer Support.
Authorization
You request a
credit card authorization when a customer places an order. When you
successfully request authorization, the issuing bank for the credit card
reduces your customer's "open to buy," or the amount of credit
available on the card. The bank does not move money into your account until you
settle the authorization.
Authorization
happens in real time; in other words, the bank verifies credit availability and
reduces your customer's available credit as soon as you request authorization.
Authorizations
expire with the issuing bank after a specific length of time if they have not
been settled. Most authorizations expire within five to seven days, but the
issuing bank determines the time.
If an
authorization expires with the issuing bank, your bank or processor might
require you to resubmit an authorization request, and include a request for
settlement in the same message.
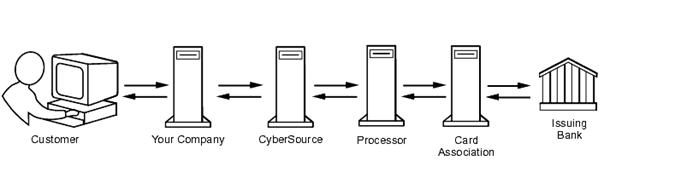
The following
steps take place when you request an authorization:
Your customer
places an order and provides the required information about the card.
You use CyberSource Credit Card Services to request authorization.
If the customer
buys a digitally delivered product or service, you can request both
authorization and settlement at the same time. If the customer buys a
physically fulfilled product, do not request settlement
until you ship the product.
The CyberSource server contacts your credit card processor and
requests authorization.
The processor
sends the transaction to the correct card association, and the card association
sends the transaction to the issuing bank for the customer's credit card.
Some card
companies, including Discover and American Express, act as their own issuing
banks.
The issuing bank
checks some or all of the following information:
·Is the card number valid?
·Has the card been reported lost or stolen?
·Does the cardholder have enough credit
available?
·Does the billing address match the address that
the customer provided?
The issuing bank
approves or declines the request and sends a reply to the card association,
which sends a reply to the processor.
The processor
sends the reply to the CyberSource server.
The CyberSource server sends the reply to your company's
server.
This includes a
calculated order total and a request ID that are used by the settlement service
if requested simultaneously. CyberSource also uses
its own tests to evaluate the returned information and notifies you if the
tests identify the possibility of fraud.
Your company's
server displays an appropriate message to the customer.
Authorization
Reversal
The authorization
reversal service reverses a previous authorization and releases the hold that
authorization placed on credit card funds. Use this service in exceptional
situations to reverse an unnecessary or undesired authorization. You can only
use authorization reversal for an authorization that has not been settled.
CyberSource supports authorization reversal for the
following processors:
·Barclays
·Citibank Meerbusch
·FDMS Nashville
·Streamline
·Vital (Visa cards only)
Settlement
You request
settlement when you fulfill a customer's order. When you
settle an authorization, your acquiring bank deposits money into your account,
usually after deducting its own fees.
Important Card association rules
generally specify that you not settle an authorization until you have shipped
the products to the customer.
If you can
fulfill only part of a customer's order, do not settle for the full amount of
the authorization. Settle only for the cost of the items that you ship. When
you ship the remaining items, request a new authorization, then settle the
authorization.
Due to the
potential delay between authorization and settlement, the authorization might
expire with the issuing bank before you request settlement. Most authorizations
expire within five to seven days, but the issuing bank determines the time.
If an
authorization expires with the issuing bank before you request settlement, your
bank or processor might require you to resubmit an authorizationrequest,
and include a request for settlement in the same message.
Unlike
authorizations, settlement does not happen in real time. All of the settlements
for a day are placed in a batch file, and in most cases, the batch is settled
at night. It usually takes two to four days for your acquiring bank to deposit
funds in your merchant bank account.
The following
steps take place when you request settlement:
You use CyberSource's Credit Card Services to request settlement
for an earlier authorization.
The CyberSource server verifies that it has a record of the
authorization you want to settle, then sends you a reply.
If the request is
successful, the CyberSource server adds the
settlement to a batch.
When the batch is
ready to be processed, the CyberSource server
contacts your credit card processor and requests settlement.
After the
processor receives the batch file, it sends the transaction to the issuing bank
for the customer's credit card.
The issuing bank
approves or declines the request and sends a reply to the processor. If the
request is approved, the issuing bank settles the request with the acquiring
bank and transfers funds to the appropriate account.
Credit
You request a
credit when you need to give your customer a refund. When you successfully
request a credit, the issuing bank for the credit card takes money out of your
merchant bank account and returns it to the customer. It usually takes two to
four days for your acquiring bank to transfer funds from your merchant bank
account.
Carefully control
access to this application to prevent unauthorized credits. Do not request
this application directly from your customer interface. Instead, incorporate
this application as part of your customer service process.
Getting
Started
To get started on
the implementation of your Credit Card Services system choose
a client integration or development kit, available on the CyberSource Support Center.